Area of interest as a means of limiting product search using Data Explorer on CopPhil
In this article, you will learn how to limit search results on Data Explorer by creating an Area of Interest (AOI). The AOI can be either a polygon or a point and you will use it in conjunction with all other parameters in the Search panel.
Prerequisites
No. 1 Access to Data Explorer
Data Explorer used in this article is available here: https://explore.infra.copphil.philsa.gov.ph/search
You don’t need to be logged in to search for products.
However, you need to be logged in if you want to be able to download products.
If needed, refer to this article:
How to register and login to Data Explorer on CopPhil cloud
No. 2 Adjusted search criteria in the search panel
To get accurate results, adjust search criteria in Search panel. Learn more here:
How to search for products using Data Explorer on CopPhil
No. 3 Geometry file
To limit search results by area defined via a geometry file, you need to have a file in one of the following formats:
.geojson
.kml
.wkt
Follow this article to create an example .geojson or .kml file:
Create example polygon file with QGIS for use with Data Explorer on CopPhil cloud
What We Are Going To Cover
Area of interest (AOI) - General information
Places
Polygon
Point
Geometry file
Area of interest (AOI) - General information
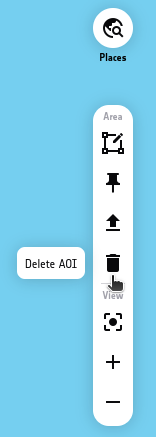
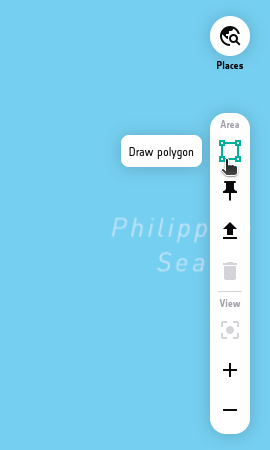
You can optionally limit your results to a specified area of interest (AOI) using options found in the right side of the page:

There are multiple methods of providing this area.
If you have already provided an area of interest and you want to center your map on it, click Center AOI:

To clear an area of interest, use the trash can icon:
Places
Near the top right corner of the page, click Places
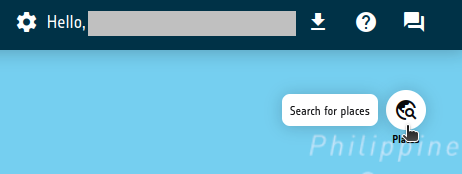
The icon extends to a text field Enter your location name…
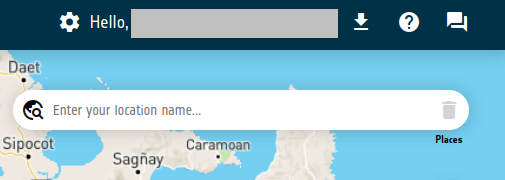
In this text field, enter the name of the place to which you want to limit your search.
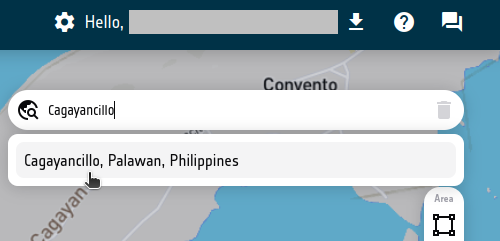
For example, to limit the results to Cagayancillo, Palawan, Philippines, enter this name (or part of its name) and click on the appropriate suggestion:
Polygon
Another method of providing the area of interest is drawing a polygon interactively.
On the right side of the page, click Draw polygon
The following suggestion should appear somewhere on the map:
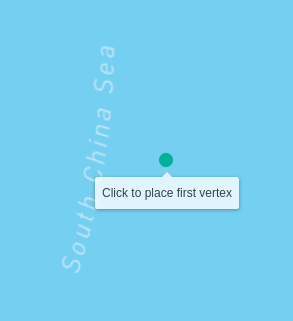
This vertex can be placed anywhere on the map by left-clicking:
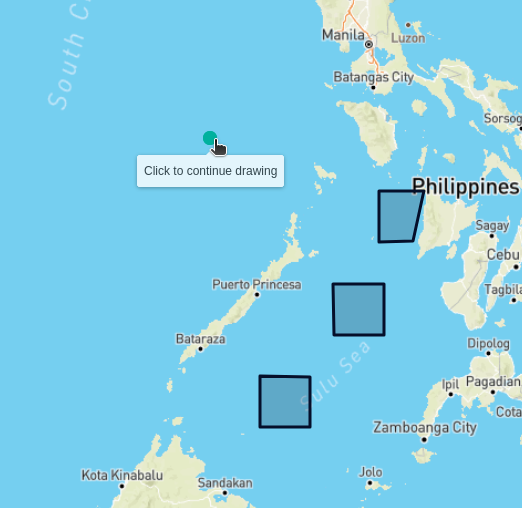
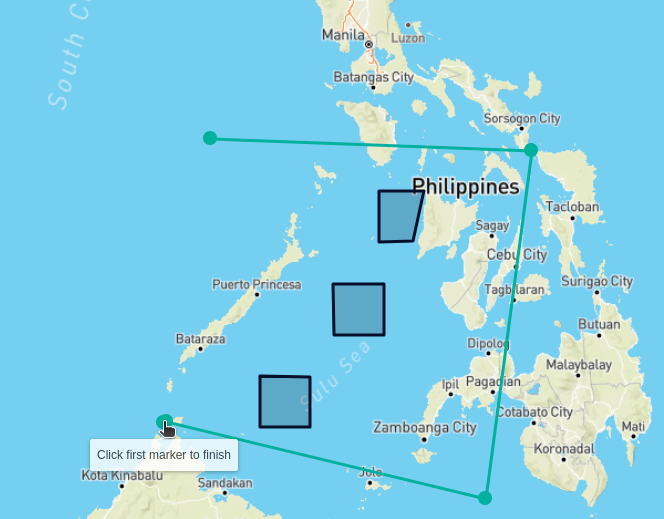
The above image shows three polygons with black edges in Sulu Sea. (These polygons appeared on the map because we have previously browsed a product through the Search panel.) Let us now state that our goal is to examine a bit wider space around those three polygons and that to that end, we are going to interactively create a polygon (in green color) that surrounds those three polygons in black color.
Move the mouse to the place in which you want to place the second vertex and click:
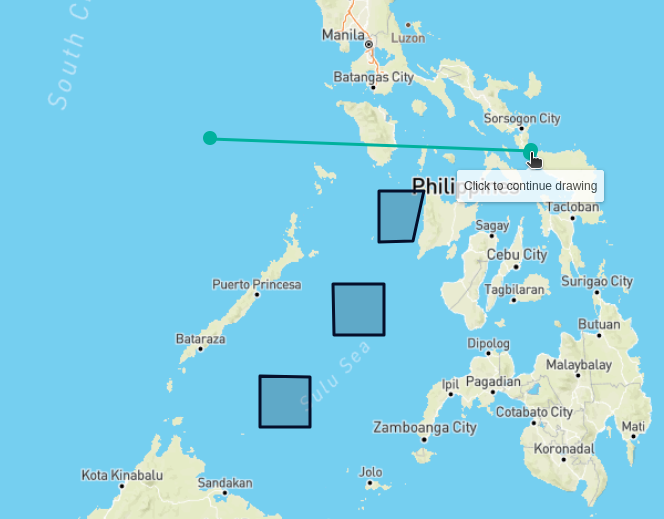
Continue adding vertices you need:
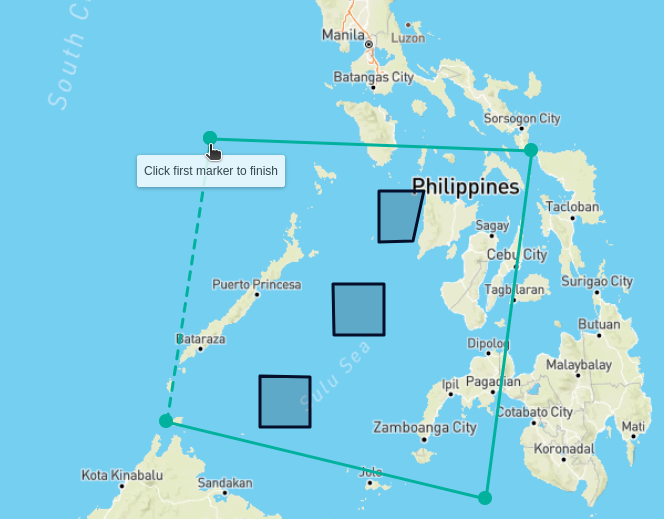
In the end, click on the first vertex to finish the polygon:
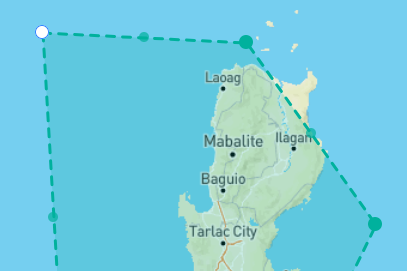
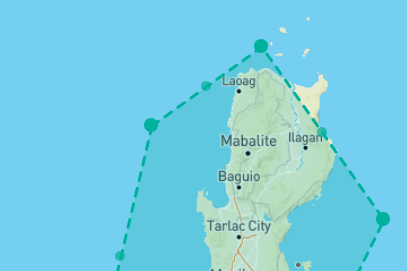
If there is need to change the position of one of the vertices of the green polygon, the process has three steps:
click on Edit polygon icon; its vertices will become green and the edges will become dotted
click on the vertex you want to reposition (its color will turn to white) and move the white circle to the new position;
once you lift the finger from the mouse and then click anywhere on the map, the vertex will attain new value and its color will turn to customary green.
Point
To set a single point as your area of interest, click the pin icon:

You will then be able to select point on the map or enter point coordinates:
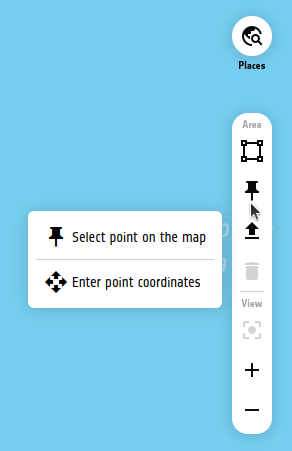
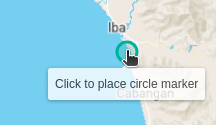
Selecting point on the map
Click Select point on the map.
Left click on the place on the map in which you want to add the point:
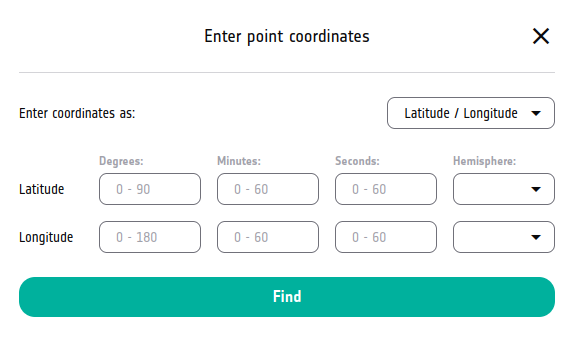
Entering point coordinates
Click Enter point coordinates.
You should get the following window:
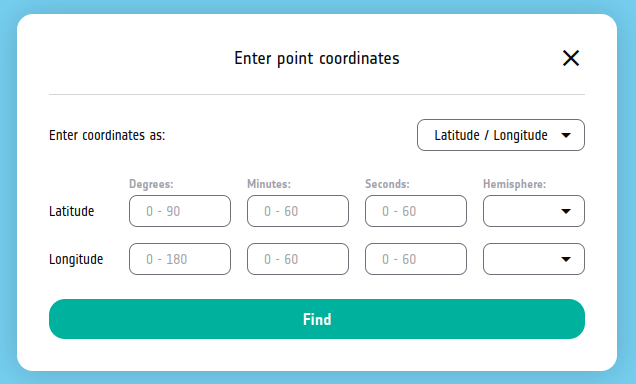
Drop-down menu Enter coordinates as enables two methods of entering the point:
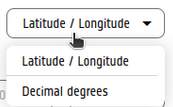
- Latitude / Longitude
Express the latitude and the longitude of the point in degrees, minutes and seconds; additionally, decide upon the hemisphere (North or South):
- Decimal degrees
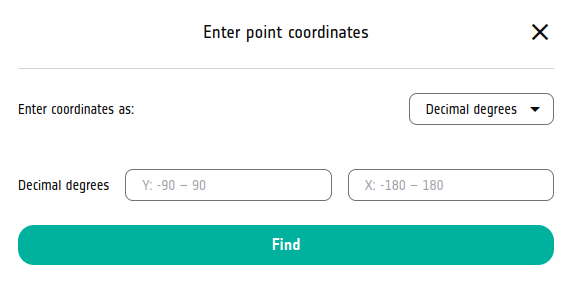
No matter which method you choose, provide the correct coordinates and click Find.
Geometry file
To provide an area of interest, you can upload file in one of the following types:
.geojson
.kml
.wkt
If you don’t have one, you can follow Prerequisite No. 3.
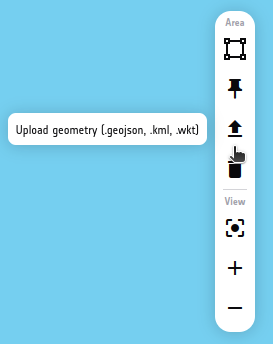
Click Upload geometry
You should get the following window:
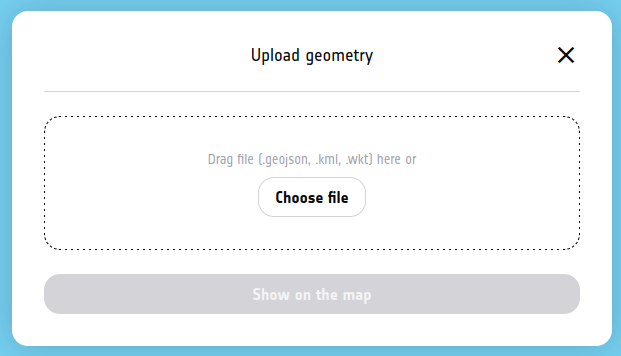
Click Choose file and upload your file:
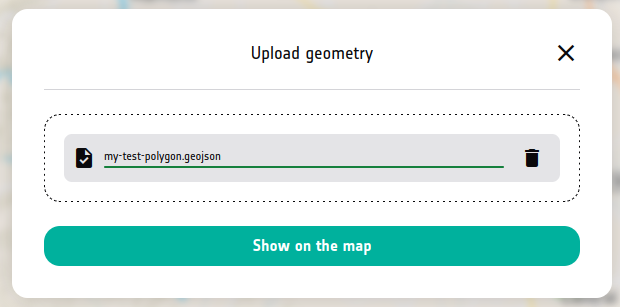
Click Show on the map.
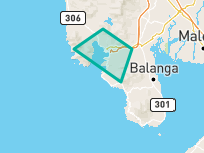
Your area of interest should now be visible within the Data Explorer map.
If you used example file from article in Prerequisite No. 3, this is how it should look like:
What To Do Next
Once you have
defined all search parameters and
limited your search results by the area of interest,
you might want to download some or all of the selected products. Check this article: How to browse and download products using Data Explorer on CopPhil